Chest Supported T-Bar Row vs. T-Bar Row: Which is Best?

When it comes to building a strong back, both the chest-supported T-bar row and the traditional T-bar row are excellent choices. Each variation offers unique benefits and targets the muscles in slightly different ways. In this article, we’ll explore the differences between these two exercises to help you decide which one is best for your training routine.

1. Muscle Targeting

  • Chest-Supported T-Bar Row: This variation emphasizes the upper and middle back, specifically the rhomboids, trapezius, and lats. The chest support reduces the involvement of the lower back, allowing for better isolation of the upper back muscles.
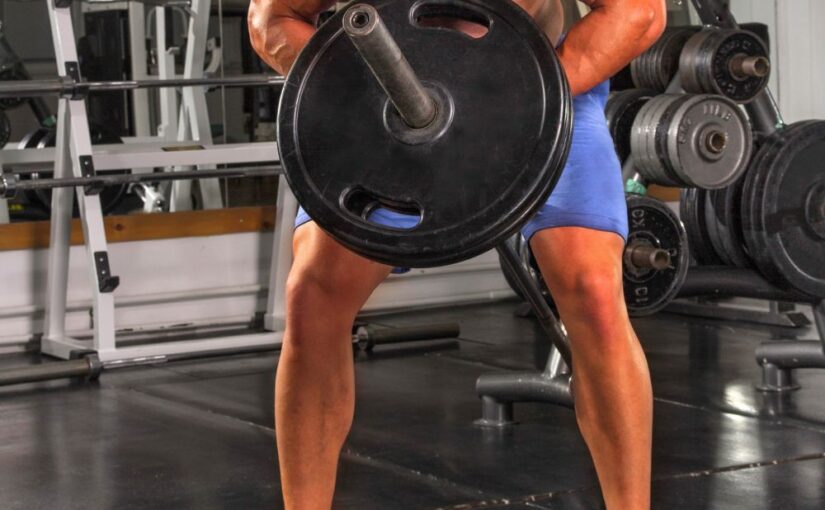
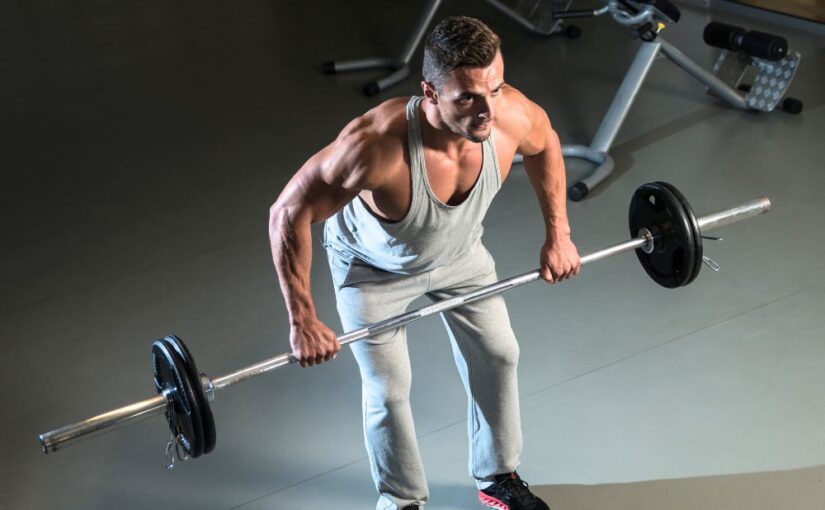
  • Traditional T-Bar Row: The classic T-bar row targets the entire back, including the lats, traps, and lower back. It engages more stabilizing muscles, as the lifter must maintain balance throughout the movement.

2. Range of Motion

  • Chest-Supported T-Bar Row: The support provided by the bench allows for a controlled range of motion, helping to ensure proper form and maximizing muscle engagement. This setup can promote a deeper contraction of the back muscles.
  • Traditional T-Bar Row: The range of motion in a traditional T-bar row can vary depending on the grip and stance. This variation can lead to greater overall muscle activation, but it may also require more attention to form to avoid strain.

3. Equipment and Setup

  • Chest-Supported T-Bar Row: This exercise typically requires a T-bar row machine with a chest support feature. It’s often found in more specialized gyms, making it less accessible than the traditional T-bar row.
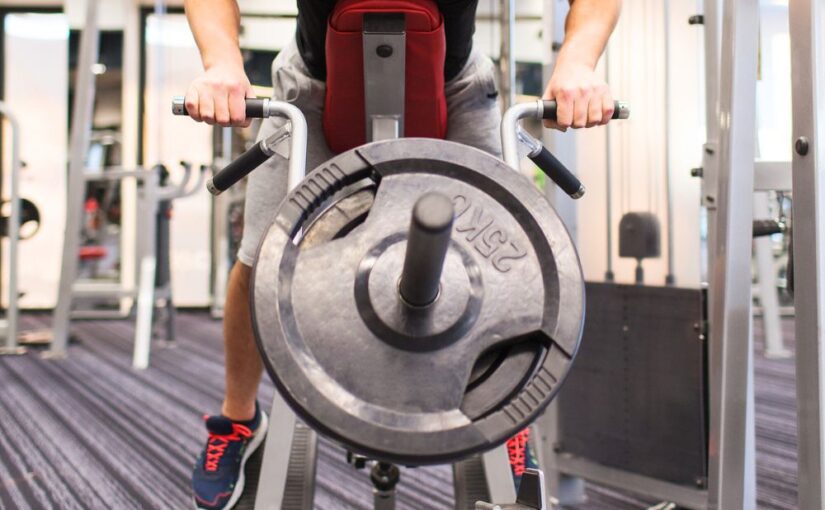
  • Traditional T-Bar Row: The equipment needed for a traditional T-bar row is relatively simple, requiring just a barbell and a landmine attachment or T-bar row station. This makes it more widely available and easier to set up in most gyms.

4. Safety and Stability

  • Chest-Supported T-Bar Row: The chest support stabilizes the upper body, which can help reduce the risk of injury and allow for a stronger focus on the back muscles. This makes it an excellent choice for anyone with lower back problems.
  • Traditional T-Bar Row: While effective, the traditional T-bar row can place strain on the lower back if not performed correctly. It requires good core stability and proper form to minimize injury risk.

5. Training Goals

  • Chest-Supported T-Bar Row: Ideal for those focusing on upper back development and looking to isolate back muscles without straining the lower back. This variation is particularly beneficial for rehabilitation or as a complementary exercise in a well-rounded routine.
  • Traditional T-Bar Row: Better suited for those aiming for overall back strength and hypertrophy. This exercise engages multiple muscle groups and can be a staple for anyone looking to build mass in their upper body.

Chest-Supported T-Bar Row vs Traditional T-Bar Row

CategoryChest-Supported T-Bar RowTraditional T-Bar Row
Muscle EmphasisFocuses on upper and middle back (rhomboids, traps, lats)Engages full back including lower back and core stabilizers
Lower Back LoadMinimal, thanks to chest supportModerate to high—requires strong core and proper form
Range of MotionControlled, stable range promoting strict formGreater variability depending on grip and stance
Equipment NeededSpecialized machine with chest supportBarbell and landmine or T-bar row handle
AccessibilityLess common—found in specialized gymsWidely available in most commercial or home gyms
StabilityHigh—bench support removes need for torso stabilizationLower—requires lifter to stabilize entire body
Ideal ForMuscle isolation, rehab, avoiding lower back strainOverall strength, mass-building, functional pulling power
Injury RiskLow, especially for those with lower back concernsHigher if performed with poor form or excessive weight

Conclusion

Both the chest-supported T-bar row and the traditional T-bar row are effective exercises for back development, but they serve different purposes. If you’re looking to isolate your upper back and minimize lower back strain, the chest-supported variation is a great choice. On the other hand, if you want to engage a broader range of muscles and focus on overall back strength, the traditional T-bar row may be more suitable.

Incorporating both exercises into your routine can provide a balanced approach to back training. Assess your fitness goals, available equipment, and any physical limitations to determine which exercise fits best in your workout regimen. Regardless of your choice, both can lead to a stronger, more defined back!


Frequently Asked Questions (FAQ)

What Distinguishes a Chest-supported T-bar Row From a Traditional T-bar Row?

The chest-supported variation uses a bench to stabilize your torso, helping you target the upper back muscles more effectively while minimizing stress on the lower back. The traditional version requires you to stabilize your body, engaging more muscle groups including the core and lower back.

Which Exercise is Better for Beginners?

The chest-supported T-bar row is generally better for beginners, as it provides more stability and reduces the risk of lower back strain.

Can I Do Both Chest-supported and Traditional T-bar Rows in My Program?

Yes, incorporating both can provide a balanced approach—use the chest-supported row for strict isolation and the traditional version for building overall strength and muscle mass.

Which One is Better for People With Lower Back Issues?

The chest-supported version is safer for individuals with lower back problems because it removes spinal loading by supporting the chest.

Do Both Exercises Target the Same Muscles?

They both target similar back muscles—like the lats, traps, and rhomboids—but the traditional version also heavily involves the lower back and core due to the unsupported position.

Recommended Equipment for Your Back Training Routine

To get the most out of your back workouts, consider adding the following pieces of equipment to your setup. These accessories can enhance your T-bar row experience and take your training to the next level:

Seated Row Machine
A high-quality seated row machine is perfect for isolating your back muscles. It offers a secure and comfortable platform to effectively target the lats, traps, and rhomboids.

Landmine Attachment
A landmine attachment allows you to perform traditional T-bar rows with ease. It’s a multi-purpose piece of equipment that can be utilized for various exercises, such as the landmine press, single-arm rows, and rotational movements, to boost your training.

Barbell Set
A reliable barbell set is essential for performing traditional T-bar rows. Look for a set that includes multiple weight options to customize your resistance and track your progress.
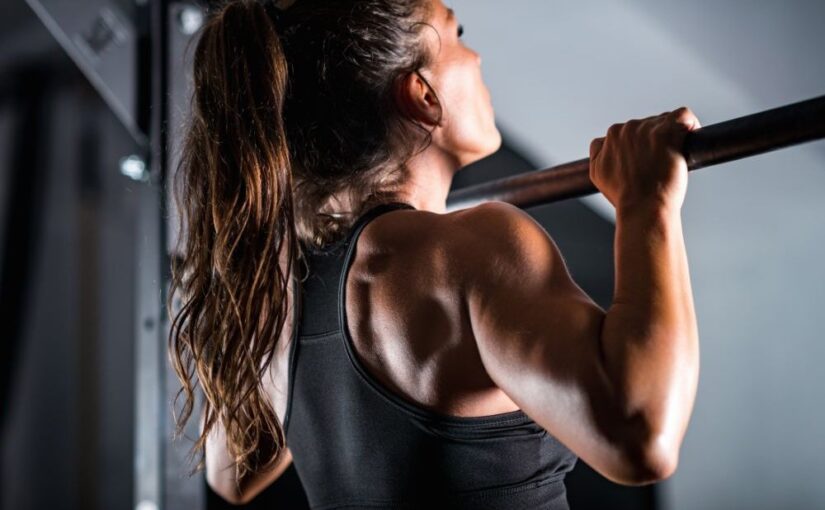
Pull-Up Bar
Pull-up bars complement your back training routine by helping you target the lats and rhomboids. They’re great for adding variety and improving overall back strength.

Adjustable Weight Bench
An adjustable weight bench is key for performing chest-supported T-bar rows. Its ability to set different angles allows you to tailor the support to your needs for better isolation of the upper back muscles.


    Affiliate Disclaimer

    The above links are affiliate links, which means that at no additional cost to you, we may earn a small commission if you make a purchase through these links.

    T-Bar Row vs. Seated Row: Which Should You Choose?

    When it comes to building a strong and defined back, two popular exercises often come up: the T-bar row and the seated row. Both are effective in targeting back muscles, but they have distinct features that may make one more suitable for your goals than the other. In this article, we’ll compare T bar row vs seated row to help you choose the best option for your workout routine.

    1. Muscle Targeting

    • T-Bar Row: This exercise primarily targets the middle back, focusing on the latissimus dorsi, rhomboids, and trapezius. The angle of the pull helps engage the lower back and biceps as well, making it a compound movement.
    • Seated Row: The seated row effectively targets the entire back, including the lats, rhomboids, and traps. Depending on the grip used, it can also engage the biceps and forearms. The seated position allows for a stable base, helping to isolate the back muscles more effectively.

    When comparing T bar row vs seated row in terms of muscle targeting, both offer excellent engagement, but your choice may depend on whether you’re aiming for mass or isolation.

    2. Range of Motion

    • T-Bar Row: T-bar rows allow for a free range of motion, which can help enhance muscle engagement. The position and angle of the movement encourage a deep contraction of the back muscles.
    • Seated Row: The seated row typically has a more controlled range of motion due to the fixed path of the cable. This can help maintain consistent form and focus on the contraction of the back muscles.

    3. Equipment and Setup

    • T-Bar Row: This exercise requires a T-bar row machine or a landmine setup, making it less accessible in some gyms. However, it offers a robust option for those looking to incorporate variation into their back training.
    • Seated Row: The seated row machine is widely available in most gyms and is easy to use. It often features adjustable settings to accommodate different body sizes and improve comfort.

    4. Safety and Stability

    • T-Bar Row: While generally safe, T-bar rows can put stress on the lower back if performed with poor form. Proper technique is essential to avoid injury, particularly when lifting heavier weights.
    • Seated Row: The seated row offers a stable position that minimizes the risk of injury, especially for those new to strength training. The seated setup helps keep the back supported, allowing for a more controlled movement.

    5. Training Goals

    • T-Bar Row: Ideal for individuals looking to build mass and strength in the middle back. T-bar rows can be a great choice for advanced lifters aiming for hypertrophy and overall upper body strength.
    • Seated Row: Better suited for those focusing on muscle isolation and form. This exercise is excellent for beginners and those looking to refine their technique while targeting the back muscles effectively.

    T Bar Row vs Seated Row – Exercise Comparison

    CategoryT Bar RowSeated Row
    Primary Muscles WorkedMiddle back, lats, rhomboids, traps, bicepsLats, rhomboids, traps, biceps, forearms
    Range of MotionFree range of motion; encourages full contractionMore controlled and fixed due to cable machine
    StabilityLess stable—requires core engagement and proper formMore stable—seated position with back support
    Equipment NeededT-bar row machine or landmine setupCable machine with seated row attachment
    Ideal ForBuilding mass and strength; compound trainingMuscle isolation, form control, beginner-friendly
    Risk FactorHigher if form breaks—can strain lower backLower risk due to seated and supported position
    AccessibilityMay not be available in all gymsCommon in most commercial gyms

    Conclusion

    Both T-bar rows and seated rows are effective exercises for developing back strength and muscle. If you’re looking for a compound movement that emphasizes the middle back and allows for a free range of motion, the T-bar row is a solid choice. On the other hand, if you prefer a stable setup that focuses on isolation and controlled movements, the seated row may be more suitable.

    In the debate of T bar row vs seated row, there’s no one-size-fits-all answer—it really depends on your training goals and experience level. Incorporating both exercises into your routine can provide a balanced approach to back training. Consider your fitness goals, available equipment, and personal preferences to determine which exercise fits best into your regimen. Whichever you choose, both can lead to a stronger, more defined back!


    Frequently Asked Questions (FAQ)

    Which is Better for Back Development: T Bar Row or Seated Row?

    Both exercises are effective for back development. T bar rows develop overall back strength and muscle size, while seated rows are better suited for isolating muscles with precise, controlled movement.

    Is the T Bar Row More Challenging Than the Seated Row?

    Generally, yes. T bar rows require more core stability and proper form to avoid strain, making them slightly more challenging, especially for beginners.

    Can I Include Both T Bar Row and Seated Row in the Same Workout?

    Absolutely. Including both exercises in your routine can provide a well-rounded back workout, targeting different angles and muscle activation patterns.

    Which Exercise is Safer for Beginners?

    The seated row is typically safer for beginners due to its stable, supported position. It allows for controlled movement and reduces lower back strain.

    Do T Bar Rows and Seated Rows Work the Same Muscles?

    They target many of the same back muscles, like the lats, traps, and rhomboids, but differ in emphasis. T bar rows hit the middle back harder, while seated rows promote balanced activation and isolation.

    Essential Equipment for Row Variations at Home

    To make the most of your back workouts, having the right equipment is key. Whether you’re doing seated rows or T bar rows, these accessories can help you perform each variation effectively and safely.

    Seated Row Machine

    A seated row machine provides the support and control needed for targeting your lats, rhomboids, and traps. Its stable design makes it beginner-friendly and ideal for focused muscle engagement.

    Seated Row Attachment

    If you own a cable system, adding a seated row attachment can expand your exercise options and enhance workout variety. These attachments often include wide, narrow, and neutral grip options to vary muscle activation.

    Barbell Landmine Base

    A landmine base turns a standard barbell into a functional tool for T bar rows and other rotational exercises. It’s compact, making it perfect for home gym setups.

    T Bar Row Handle

    This attachment fits onto your barbell to provide a secure, ergonomic grip for T bar rows. It promotes proper form and helps minimize wrist discomfort during heavy lifting.


    Affiliate Disclaimer:

    The above links are affiliate links, meaning we could earn a small commission if you purchase through them—at no additional cost to you.

    Barbell Rows vs. T-Bar Rows: Which Should You Choose?

    When it comes to building a strong back, both barbell rows and T-bar rows are popular choices among lifters. Each exercise offers unique benefits and challenges, making it essential to understand their differences. Let’s compare barbell rows and T-bar rows to help you decide which one may be best for your fitness goals.

    1. Muscle Targeting

    • Barbell Rows: This exercise primarily targets the upper and middle back, specifically the latissimus dorsi, rhomboids, and trapezius. It also engages the core and biceps, making it a compound movement that works multiple muscle groups.
    • T-Bar Rows: T-bar rows also focus on the back but place a greater emphasis on the middle back due to the angle of the pull. They target the lats, rhomboids, and traps, while also involving the lower back and biceps.

    2. Range of Motion

    • Barbell Rows: The range of motion in barbell rows can vary based on your stance and technique. You can adjust the grip (overhand or underhand) to target different muscles slightly differently.
    • T-Bar Rows: T-bar rows typically allow for a more controlled range of motion, helping to isolate the back muscles better. The fixed position of the handles can promote a consistent form throughout the exercise.

    3. Equipment and Setup

    • Barbell Rows: All you need is a barbell and weights. They can be performed anywhere with sufficient space and are highly versatile, allowing for various grip widths and body positions.
    • T-Bar Rows: These require a T-bar row machine or a landmine attachment, making them less accessible than barbell rows. However, the equipment can provide added stability, which can be beneficial for maintaining proper form.

    4. Safety and Stability

    • Barbell Rows: While effective, barbell rows can put strain on the lower back if not performed with proper form. A strong core is essential to stabilize the body throughout the lift.
    • T-Bar Rows: The design of T-bar rows allows for a more stable setup, which can help reduce the risk of injury. The supported stance can be particularly advantageous for beginners or those with lower back issues.

    5. Training Goals

    • Barbell Rows: Ideal for building overall strength and mass, barbell rows are excellent for those looking to increase their lifting capacity and improve functional fitness.
    • T-Bar Rows: Better suited for those focusing on muscle isolation and developing the middle back. They can also be a great option for advanced lifters seeking variation in their back workouts.

    Conclusion

    Both barbell rows and T-bar rows have distinct advantages that can contribute to a well-rounded back workout. If you’re looking for versatility and the ability to perform the exercise anywhere, barbell rows are an excellent choice. On the other hand, if you want to focus on isolating the middle back with a more stable setup, T-bar rows may be the way to go.

    Ultimately, adding  both exercises into your routine can provide a comprehensive approach to back development. Consider your fitness goals, available equipment, and personal preferences to determine the best fit for your training program.  

    Unlock Strength: Discover the Benefits of Barbell Rows

    Barbell rows are a fundamental exercise in strength training that often gets overshadowed by more popular lifts like the bench press and squat. However, incorporating barbell rows into your workout routine can yield significant benefits for your overall strength, posture, and athletic performance. Here’s a closer look at why barbell rows should be a staple in your training program.


    1. Comprehensive Back Development

    Targeting Key Muscles
    Barbell rows primarily target the muscles of the back, including the latissimus dorsi, rhomboids, and trapezius. Strengthening these muscles creates a balanced physique and enhances upper body strength.

    Functional Strength
    A strong back is essential not only for aesthetics but also for functional strength in daily activities and sports. Among the key benefits of barbell rows is their ability to develop these muscles in a highly efficient, compound movement.


    2. Improved Posture

    Counteracting Sedentary Habits
    In our sedentary world, poor posture has become increasingly common. Barbell rows engage the muscles responsible for maintaining good posture, particularly the upper back.

    Promoting an Upright Stance
    By regularly performing this exercise, you can strengthen these muscles, counteracting the effects of prolonged sitting and promoting a more upright and confident stance.


    3. Enhanced Core Stability

    Engaging Core Muscles
    Although barbell rows primarily focus on the upper body, they also engage the core muscles. As you stabilize your body during the movement, your abdominals and obliques work hard to maintain balance.

    Injury Prevention
    This dual benefit helps build core strength, crucial for overall stability and injury prevention in other lifts.


    4. Functional Strength Gains

    Real-World Applications
    Barbell rows mimic real-world movements, such as pulling and lifting. This makes them a functional exercise that translates to better performance in daily tasks and athletic activities.

    Sports Performance
    Improved pulling strength enhances your capabilities in sports that require powerful upper body movements, such as rowing, swimming, and climbing.


    5. Versatility and Variations

    Multiple Exercise Options
    One of the significant advantages of barbell rows is their versatility. Variations like bent-over rows, Pendlay rows, and T-bar rows each target slightly different muscle groups.

    Preventing Monotony
    This adaptability means you can continuously challenge yourself and keep your workouts fresh.


    6. Improved Grip Strength

    Strengthening the Grip
    Performing barbell rows requires a strong grip, contributing to improved grip strength over time.

    Practical Applications
    Enhanced grip strength benefits your performance in other lifts and has practical applications in everyday life, from carrying groceries to opening jars.


    7. Potential for Muscle Hypertrophy

    Stimulating Muscle Growth
    For those looking to increase muscle size, barbell rows can be an effective hypertrophy exercise. Using progressive overload—gradually increasing the weight lifted—stimulates muscle growth.

    Time Efficiency
    Targeting multiple muscle groups simultaneously makes barbell rows a time-efficient way to build muscle.


    8. Joint Stability and Health

    Supporting Shoulder Mechanics
    Strengthening the muscles around your shoulder joints can help stabilize them, reducing the risk of injuries.

    Maintaining Shoulder Health
    Stronger back muscles support proper shoulder mechanics, which is essential for maintaining shoulder health, especially for athletes engaging in overhead movements.


    Benefits of Barbell Rows by Fitness Goal

    Fitness GoalHow Barbell Rows Help
    Back DevelopmentStrengthens lats, rhomboids, and traps for a balanced upper body
    Improved PostureEngages upper back to counteract slouching from sedentary habits
    Core StabilityRequires core engagement to maintain proper form and balance
    Functional StrengthMimics pulling/lifting motions used in sports and daily activities
    Muscle GrowthEffective for hypertrophy with progressive overload
    Grip StrengthImproves grip by requiring sustained tension under load
    Joint HealthStrengthens stabilizers around shoulder joints

    Conclusion

    Barbell rows are an excellent addition to any strength training program. They provide comprehensive back development, improve posture, enhance core stability, and promote functional strength. Whether you’re a seasoned lifter or just starting out, incorporating barbell rows can lead to significant improvements in your overall fitness.

    Key Takeaway: Focus on proper form to maximize benefits and minimize the risk of injury. Start integrating barbell rows into your routine and experience their transformative effects!


    Frequently Asked Questions (FAQ)

    What Are the Main Benefits of Barbell Rows?

    Barbell rows help build upper and lower back strength, improve posture, enhance core stability, and support better athletic and functional performance.

    Are Barbell Rows Good for Beginners?

    Yes, barbell rows can be performed by beginners, provided they start with lighter weights and focus on proper form to avoid strain or injury.

    Do Barbell Rows Help Improve Posture?

    Definitely. Barbell rows help strengthen the upper and middle back, which can help correct poor posture resulting from long periods of sitting and slouching.

    What Muscles Do Barbell Rows Target?

    This exercise mainly focuses on the latissimus dorsi, rhomboids, trapezius, and rear deltoids, while also activating the core and grip muscles throughout the movement.

    How Often Should I Do Barbell Rows?

    Most training programs include barbell rows 1–2 times per week, depending on your goals and overall workout split. Rest and recovery are important for results.

    Essential Equipment for Building a Strong Back at Home

    Building a strong back starts with having the right equipment. Whether you’re doing barbell rows, pull-ups, or other exercises, investing in quality gear can make all the difference. Below are some recommended products to help you get started:

    Barbell Sets

    A complete barbell set provides everything you need for a full-body workout. It includes a barbell, weight plates, and collars, so you’re ready for exercises like rows, squats, and bench presses.

    Pull-Up Bars

    Pull-ups are a fantastic exercise for developing a strong back. With a reliable pull-up bar, you can effectively target your lats, rhomboids, and traps using just your body weight.

    Barbells

    A quality barbell is the foundation of any serious back training routine. Look for a barbell that fits your strength goals and is durable enough to handle heavy lifting.


    Affiliate Disclaimer:

    The links above are affiliate links, meaning we may earn a commission at no extra cost to you if you make a purchase.

    Benefits of Spin Bike Workouts for Your Fitness Journey

    Spin bike workouts have gained immense popularity in recent years, becoming a staple in many fitness routines and group classes. These high-energy sessions not only provide an excellent cardiovascular workout but also offer a range of benefits for people of all fitness levels. In this article, we’ll explore the numerous benefits of spin bikes and why incorporating them into your fitness regime can be a game changer.

    1. Cardiovascular Fitness

    One of the most significant benefits of spin bikes is their ability to improve cardiovascular health. Cycling at a high intensity elevates your heart rate, which strengthens your heart and enhances blood circulation. Regular spin sessions can lead to improved endurance, allowing you to perform daily activities with greater ease.

    2. Calorie Burning

    Spin workouts are known for their calorie-torching potential. Depending on the intensity and duration of your workout, you can burn anywhere from 400 to 600 calories in just one session. This makes spinning an effective option for those looking to lose weight or maintain a healthy weight.

    Benefits of Spin Bikes: Improve Fitness and Burn Calories

    GoalHow Spin Bikes Help
    Lose WeightBurns 400–600+ calories per session
    Build EnduranceBoosts cardiovascular capacity with interval and steady rides
    Tone Lower BodyEngages glutes, quads, hamstrings, and calves
    Protect JointsLow-impact motion reduces joint strain vs. running
    Improve Mental HealthReleases endorphins; reduces stress and boosts mood
    Stay MotivatedGroup classes and music keep energy high and workouts engaging
    Customize WorkoutsAdjustable resistance suits all fitness levels and goals
    Save TimeHigh-efficiency workouts in just 45–60 minutes

    3. Low Impact Exercise

    Unlike running or other high-impact exercises, spin bike workouts are low-impact, reducing the risk of injury to your joints. This makes it an ideal option for individuals recovering from injuries or those with joint concerns. You can enjoy a challenging workout without the stress on your knees and ankles.

    4. Muscle Toning

    Spin biking engages multiple muscle groups, particularly in the lower body. The quadriceps, hamstrings, glutes, and calves all get a workout as you pedal. Adjusting the resistance on the bike allows you to vary the intensity, enabling you to build strength and tone your muscles over time.

    5. Mental Health Benefits

    Engaging in regular spin workouts can also enhance your mental well-being. The combination of physical activity and high-energy music can boost your mood and reduce stress levels. Many participants report feelings of euphoria and accomplishment after completing a spin session, thanks to the release of endorphins.

    6. Versatility and Customization

    Another one of the major benefits of spin bikes is their adaptability. You can adjust the resistance to suit your fitness level and personal goals, whether you’re looking for a challenging workout or a lighter session. Additionally, spin classes often incorporate various styles, such as intervals, climbs, and sprints, keeping the workouts fresh and exciting.

    7. Community and Motivation

    Participating in spin classes fosters a sense of community and camaraderie. The group setting can be highly motivating, encouraging you to push through tough moments and achieve your fitness goals. The energy of the instructor and fellow participants can make the workout feel less daunting and more enjoyable.

    8. Time Efficiency

    Spin workouts are often shorter in duration compared to other forms of exercise while still delivering significant results. A typical spin class lasts about 45 minutes to an hour, allowing you to fit a high-intensity workout into a busy schedule without sacrificing effectiveness.

    Conclusion

    There are countless benefits of spin bikes that make them a valuable addition to any fitness routine. From improving cardiovascular health and burning calories to toning muscles and boosting mental well-being, spinning provides an effective, enjoyable, and efficient way to achieve your fitness goals. Whether you’re a seasoned cyclist or new to the exercise, the benefits of spin bikes can be experienced by anyone looking to enhance their fitness journey. So hop on a spin bike, turn up the music, and get ready to pedal your way to better health!


    Frequently Asked Questions (FAQ)

    What Are the Main Benefits of Using a Spin Bike?

    Spin bikes offer a wide range of benefits including improved cardiovascular health, calorie burning, muscle toning, low-impact exercise, and mental health support. They’re also highly customizable to suit all fitness levels.

    Is Spinning Good for Weight Loss?

    Yes, spin workouts are excellent for weight loss. A single 45-minute session can burn between 400 to 600 calories, making it a highly effective fat-burning workout when combined with a healthy diet.

    Are Spin Bikes Safe for People With Joint Problems?

    Absolutely. Spin bikes provide a low-impact workout that’s easy on the knees and joints, making them ideal for people with arthritis, previous injuries, or joint sensitivity.

    How Often Should I Do Spin Bike Workouts?

    For general fitness, 3 to 5 sessions per week is effective. Beginners may start with 2 to 3 shorter sessions, while more advanced users can spin 4 to 6 times per week depending on their goals.

    Can I Get a Full-body Workout With a Spin Bike?

    Spin bikes mainly work the lower body muscles while providing a strong cardiovascular workout. However, some classes incorporate upper body movements or light weights, allowing for a more comprehensive workout.

    Recommended Gear for Your Spin Bike Workouts

    Add a spin bike to your home gym to enjoy the full benefits of indoor cycling, and pair it with a floor mat to protect your surfaces and stabilize your setup.

    Spin Bikes
    Having a spin bike at home makes it easy to enjoy consistent, high-energy workouts that boost cardiovascular health, burn calories, and build lower-body strength—all on your schedule.

    Spin Bike Floor Mats
    Floor mats protect your floors from sweat and bike movement, reduce noise, and keep your setup stable. They’re especially useful for at-home workouts.


    Affiliate Disclaimer:
    The links above are affiliate links, which means we may earn a small commission at no extra cost to you if you decide to purchase through them.

    Pull-Ups vs. Chin-Ups: Key Differences and Benefits

    Pull-ups and chin-ups are two of the most popular bodyweight exercises for building upper body strength. While they may seem similar, they have distinct differences in grip, muscle engagement, and overall benefits. This article will break down these differences, helping you choose the right exercise for your fitness goals.

    What Are Pull-Ups?

    Pull-ups are performed with an overhand grip (palms facing away) on a bar. This grip primarily targets the upper back, shoulders, and arms, particularly the latissimus dorsi, trapezius, and rhomboids.

    Benefits of Pull-Ups

    1. Upper Back Strength: Pull-ups are excellent for developing the muscles of the upper back, contributing to better posture and overall upper body strength.
    2. Core Engagement: Performing pull-ups requires stability, which means your core muscles are also engaged to maintain proper form.
    3. Variety of Variations: Pull-ups can be modified with different grips (wide, narrow, or neutral) to target specific muscles more effectively.

    What Are Chin-Ups?

    Chin-ups are executed with an underhand grip (palms facing you). This grip emphasizes the biceps and also works the back, but with a slightly different focus than pull-ups.

    Benefits of Chin-Ups

    1. Bicep Development: Chin-ups place greater emphasis on the biceps, making them a great choice for those looking to build arm strength.
    2. Easier for Beginners: Many find chin-ups easier to perform than pull-ups, thanks to the bicep involvement, which can make it more accessible for those starting out.
    3. Enhanced Shoulder Flexibility: The grip position in chin-ups can promote better shoulder mobility and flexibility.

    Key Differences

    Grip Position

    • Pull-Ups: Overhand grip (palms away).
    • Chin-Ups: Underhand grip (palms facing you).

    Muscle Activation

    • Pull-Ups: More emphasis on the upper back and lats.
    • Chin-Ups: Greater focus on the biceps along with back muscles.

    Difficulty Level

    • Many people find chin-ups to be slightly easier than pull-ups due to the bicep support, making them a good starting point for beginners.

    Which Should You Choose?

    Your fitness objectives will ultimately determine whether you choose pull-ups or chin-ups:

    • For Back Strength: If your primary goal is to strengthen your upper back and improve your overall pulling strength, incorporate pull-ups into your routine.
    • For Arm Development: If you want to focus on building your biceps and arm strength, chin-ups are the better option.
    • For Overall Fitness: Including both exercises in your workout regimen can provide balanced upper body strength and prevent plateaus.

    Tips for Performing Pull-Ups and Chin-Ups

    1. Warm Up: Always warm up your upper body before attempting these exercises to prevent injury.
    2. Focus on Form: Maintain a straight line from your head to your toes. Refrain from swinging or relying on momentum to perform the exercise.
    3. Progress Gradually: If you struggle with full pull-ups or chin-ups, consider using resistance bands or performing assisted variations until you build strength.
    4. Incorporate Both: Mixing both exercises into your routine can provide comprehensive benefits and keep your workouts varied.

    Conclusion

    Both pull-ups and chin-ups are effective exercises that can significantly enhance your upper body strength. By understanding their differences and benefits, you can make an informed decision on which exercise to prioritize based on your personal fitness goals. Whether you choose pull-ups, chin-ups, or a combination of both, these exercises will help you develop a strong, balanced upper body.

    Hack Squats: Simple Guide and Tips for Beginners

    The hack squat is a powerful exercise that targets the lower body, particularly the quadriceps, hamstrings, and glutes. Originating from traditional squats, this variation has gained popularity in gyms due to its unique mechanics and the benefits it offers for strength and muscle development. In this article, we will explore the hack squat’s benefits, proper technique, variations, and tips for incorporating it into your workout routine.

    What is the Hack Squat?

    The hack squat is typically performed on a specialized machine, which allows for a controlled movement pattern. The design of the machine provides support for the back and allows the lifter to maintain a more upright posture. This positioning reduces the strain on the lower back, making it an appealing option for those looking to strengthen their legs with reduced risk of injury.

    Benefits of the Hack Squat

    1. Targeted Muscle Activation: The hack squat primarily works the quadriceps while also engaging the hamstrings, glutes, and calves. This focused muscle activation is excellent for building lower body strength.
    2. Reduced Lower Back Strain: Unlike traditional squats, the hack squat’s machine design supports the back, allowing individuals to lift heavier weights without the risk of compromising spinal alignment.
    3. Improved Stability: The machine’s guided path helps maintain balance and stability during the movement, making it an excellent choice for beginners or those recovering from injuries.
    4. Versatile: Hack squats can be performed with different foot placements and stances, allowing for variation and targeting of different muscle groups.
    5. Enhanced Muscle Hypertrophy: The controlled movement and ability to use heavier weights make hack squats a great exercise for promoting muscle growth.

    Proper Technique for Hack Squats

    To perform the hack squat correctly, follow these steps:

    1. Setup: Adjust the machine to fit your height. Position your back against the pad and place your shoulders under the shoulder pads.
    2. Foot Placement: Stand on the platform with your feet shoulder-width apart or slightly wider. You can adjust foot placement to emphasize different muscles (narrow for quads, wider for glutes).
    3. Starting Position: After unlocking the machine, bend your knees to lower your body. Maintain your back pressed against the pad and your chest up.
    4. Depth: Make sure your knees remain in line with your toes as you lower yourself until your thighs are at least parallel to the ground.
    5. Returning to Start: Press through your heels to return to the beginning position, fully extending your legs while keeping control throughout the movement.
    6. Repetitions: Strive for about 3-4 sets of 8-12 repetitions, depending on your fitness level and goals.

    Variations of the Hack Squat

    While the traditional hack squat is effective, there are several variations you can incorporate:

    1. Single-Leg Hack Squat: Performing the exercise one leg at a time increases the challenge and helps improve balance and stability.
    2. Smith Machine Hack Squat: Using a Smith machine can provide additional support and allows for variations in foot placement.
    3. Weighted Hack Squats: Adding weight plates can intensify the exercise and enhance muscle growth.
    4. Box Hack Squats: Incorporating a box or platform to squat onto can help improve depth and form.

    Tips for Incorporating Hack Squats

    1. Warm-Up: Always warm up before your workout to prepare your muscles and joints for the exercise.
    2. Start Light: If you’re new to the hack squat, begin with lighter weights to focus on form before progressing to heavier loads.
    3. Listen to Your Body: Be mindful of any pain or discomfort you may feel. If something doesn’t feel right, adjust your technique or consult a fitness professional.
    4. Combine with Other Exercises: Pair hack squats with other lower body exercises, such as lunges and leg presses, for a comprehensive leg workout.
    5. Cool Down and Stretch: After your workout, take time to cool down and stretch the muscles worked to aid recovery and flexibility.

    Conclusion

    The hack squat is an excellent addition to any lower body workout routine, offering a safe and effective way to build strength and muscle. With proper technique and variations, it can cater to different fitness levels and goals. Whether you’re a beginner or an experienced lifter, incorporating the hack squat into your training regimen can yield significant benefits for your lower body strength and overall fitness.

    Stamina vs. Endurance: Key Differences Explained

    In physical fitness, the terms “stamina vs. endurance” are frequently used interchangeably, but they actually represent different facets of athletic performance. Understanding the distinctions between these two concepts is crucial for tailoring your training regimen to meet your fitness goals more effectively. Let’s explore what stamina and endurance are, how they differ, and ways to improve both.

    What is Stamina?

    Stamina is the body’s ability to exert sustained physical or mental effort. It encompasses both physical strength and the ability to maintain energy levels over time. Stamina is crucial for activities that require repeated bursts of energy, such as sprinting, weightlifting, or playing sports that involve short, intense efforts.

    Key Characteristics of Stamina:

    • Shorter Duration: Stamina is often associated with high-intensity efforts lasting from seconds to a few minutes.
    • Strength Component: It involves not just cardiovascular fitness but also muscle strength and power.
    • Mental Toughness: Stamina includes the mental aspect of pushing through fatigue and maintaining focus during high-intensity activities.

    What is Endurance?

    Endurance, on the other hand, refers to the ability to sustain a prolonged activity over an extended period, particularly at a lower intensity. This could include activities such as long-distance running, cycling, or swimming. Endurance is primarily linked to cardiovascular fitness and the efficiency of the body’s systems to supply oxygen to muscles during prolonged activity.

    Stamina vs. Endurance: While both stamina and endurance contribute to athletic performance, understanding their specific differences is crucial for designing a targeted training program.

    Key Characteristics of Endurance:

    • Longer Duration: Endurance activities are typically sustained for longer periods, often lasting over 30 minutes.
    • Aerobic Capacity: It primarily relates to cardiovascular health and the body’s ability to utilize oxygen efficiently.
    • Fatigue Resistance: Endurance involves the ability to resist fatigue over time, making it essential for long-distance events.

    Stamina vs. Endurance: The Key Differences

    AspectStaminaEndurance
    DefinitionAbility to sustain short bursts of activityAbility to sustain prolonged activity
    DurationSeconds to a few minutesMinutes to hours
    Type of ActivityHigh-intensity effortsLower-intensity, longer activities
    Physical FocusStrength and powerCardiovascular fitness
    Mental AspectMental toughness to push through fatigueMental focus over extended periods

    How to Improve Stamina

    1. Interval Training: Incorporate high-intensity interval training (HIIT) to boost your stamina by alternating between short bursts of intense exercise and recovery periods.
    2. Strength Training: Focus on building muscle strength through weightlifting and resistance exercises, which can enhance your stamina for intense activities.
    3. Circuit Training: Combine different exercises that target various muscle groups with minimal rest in between to build both strength and stamina.
    4. Sport-Specific Drills: Engage in drills that mimic the movements and intensities of your sport or activity to build stamina in relevant muscle groups.

    How to Improve Endurance

    1. Aerobic Exercises: Incorporate steady-state cardio activities such as running, cycling, or swimming at a moderate intensity for extended periods.
    2. Progressive Overload: Gradually increase the duration and intensity of your endurance workouts to improve your aerobic capacity over time.
    3. Cross-Training: Mix different forms of endurance training to prevent monotony and work different muscle groups, which can enhance overall endurance.
    4. Fueling Your Body: Ensure proper nutrition and hydration to support your endurance activities. Carbohydrates are especially important for long-lasting energy.

    Conclusion

    In conclusion, while stamina and endurance are both essential components of physical fitness, understanding the differences between the two—stamina vs. endurance—can help you tailor your training plan more effectively. Stamina focuses on your ability to perform short bursts of high-intensity activity, while endurance is about sustaining lower-intensity efforts over longer periods. By understanding these distinctions, you can create a more comprehensive approach to your fitness routine, targeting both stamina and endurance.

    Whether you’re training for a specific event or simply aiming to improve your overall fitness, incorporating strategies to enhance both stamina and endurance can help you achieve your goals. With the right balance of strength training, interval workouts, and aerobic exercises, you can boost your physical performance and achieve greater athletic success. Ultimately, improving both stamina and endurance will lead to better health, enhanced energy, and a more well-rounded fitness level.

    Tips to Boost Metabolism and Increase Your Energy

    Metabolism is the process by which your body turns food to energy. A higher metabolic rate means you burn more calories, which can aid in weight management and improve overall energy levels. Whether you’re looking to lose weight, gain energy, or simply enhance your health, there are several effective strategies to increase metabolism and support long-term wellness. Here’s a guide to help you rev up your body’s calorie-burning engine.

    1. Incorporate Strength Training

    One of the most effective ways to boost metabolism is building muscle. Muscle tissue burns more calories at rest than fat tissue, thus having more muscle means burning more calories throughout the day.

    Tips:

    • Aim for at least two days a week of strength training, focusing on all major muscle groups.
    • Include exercises such as squats, lunges, deadlifts, and bench presses.
    • Gradually increase weights and resistance to continue challenging your muscles.

    2. Engage in High-Intensity Interval Training (HIIT)

    HIIT workouts alternate between short bursts of intense exercise and periods of rest or lower-intensity exercise. This type of training can elevate your metabolism for hours after the workout is finished.

    Tips:

    • Include HIIT sessions 1-2 times per week.
    • Example routine: 30 seconds of sprinting followed by 1 minute of walking, repeated for 15-20 minutes.

    3. Stay Active Throughout the Day

    Adding more activity to your regular routine might help keep your metabolism active. This concept, known as NEAT (non-exercise activity thermogenesis), includes all the calories you burn through daily activities other than exercise.

    Tips:

    • Take the stairs instead of the elevator.
    • Stand or walk while on phone calls.
    • Aim for short walks during breaks or lunch.

    4. Eat Enough Protein

    Including protein in your diet can temporarily boost metabolism due to the thermic effect of food (TEF), which refers to the energy required to digest, absorb, and process nutrients.

    Tips:

    • Strive to include protein-rich foods in every meal, such as lean meats, fish, eggs, dairy, legumes, and nuts.
    • Consider a protein-rich snack post-workout to aid recovery and muscle synthesis.

    5. Drink Plenty of Water

    Staying hydrated is essential for optimal metabolic function. Drinking cold water can briefly boost metabolism as your body works to heat it to body temperature.

    Tips:

    • Aim for at least 8 cups (2 liters) of water a day, adjusting based on activity levels and climate.
    • To help manage your hunger, try drinking a glass of water before each meal.

    6. Get Enough Sleep

    Insufficient sleep can impact your metabolism negatively and increase the risk of weight gain. Lack of sleep impacts the hormones that control appetite, which can result in heightened cravings for unhealthy foods.

    Tips:

    • Strive for about 7-9 hours of quality sleep per night.
    • Create a consistent sleep schedule along with a relaxing bedtime routine.

    7. Drink Green Tea or Coffee

    Both green tea and coffee can boost metabolism temporarily due to their caffeine content and other compounds. Caffeine can enhance fat oxidation and improve exercise performance.

    Tips:

    • Drink 1-2 glasses of green tea or coffee each day.
    • Consider green tea extract as a supplement, but consult with a healthcare provider first.

    8. Manage Stress

    Chronic stress can induce hormonal imbalances that hinder metabolism, typically increasing cortisol levels, which may contribute to weight gain, particularly around the waist.

    Tips:

    • Engage in stress-relieving activities like yoga, meditation, and deep breathing exercises.
    • Find hobbies or activities that you enjoy to unwind.

    Comparison of Metabolism-Boosting Strategies

    StrategyImpact on MetabolismFrequency/DurationNotes
    Strength TrainingHigh (builds muscle)2-3 days a weekIncreases resting metabolic rate
    High-Intensity Interval Training (HIIT)High (post-exercise calorie burn)1-2 times a weekCan elevate metabolism for hours after workout
    Protein-Rich DietModerate (thermic effect of food)Every mealSupports muscle repair and growth
    Staying Hydrated (Cold Water)Moderate (temporary boost)Throughout the dayDrinking cold water helps briefly raise metabolism
    SleepHigh (impacts metabolic hormones)7-9 hours per nightPoor sleep negatively affects metabolism
    Green Tea or CoffeeModerate (caffeine boosts fat oxidation)1-2 cups per dayDrink in moderation for optimal effect

    Conclusion

    Increasing your metabolism is a multifaceted process that involves diet, exercise, and lifestyle adjustments. By incorporating strength training, staying active, consuming enough protein, and prioritizing hydration and sleep, you can effectively boost your metabolic rate. Keep in mind that individual results may vary, so it’s important to adopt strategies that align with your personal needs. With consistency and dedication, you can enhance your body’s ability to burn energy and support long-term health. Choosing sustainable habits to increase metabolism lays the foundation for improved fitness, lasting energy, and better weight management.


    Frequently Asked Questions (FAQ)

    How Can I Increase My Metabolism Naturally?

    To increase your metabolism naturally, focus on strength training, high-intensity interval training (HIIT), staying active, eating enough protein, and getting sufficient sleep. These strategies can help elevate your metabolic rate and support weight management.

    Can Drinking Water Help Increase Metabolism?

    Exactly, especially cold water, which can give your metabolism a temporary boost as your body works to warm it to your core temperature.

    Does Eating Protein Boost Metabolism?

    Yes, protein can enhance metabolism due to the thermic effect of food (TEF), which refers to the energy needed to digest and process protein. Including protein with each meal can help boost metabolism.

    How Does Strength Training Affect Metabolism?

    Strength training builds muscle, and muscle tissue burns more calories at rest compared to fat. Regularly including strength training in your routine can boost your metabolism over time.

    How Important is Sleep for Metabolism?

    Obtaining enough sleep is vital for supporting a healthy metabolism. Poor sleep can disrupt hormones that control appetite and metabolism, leading to weight gain and decreased energy.

    Teardrop Quads Exercises for Strong, Defined Legs

    The term “teardrop quads” refers to the VMO (vastus medialis oblique) muscle, which is part of the quadriceps group located on the inner thigh. This muscle plays a crucial role in stabilizing the knee and enhancing the overall aesthetics of the legs, giving them a defined teardrop shape. Strengthening the VMO can improve athletic performance and prevent injuries. Here’s a guide to effective exercises that target the teardrop quads and help you achieve sculpted legs.

    Why Focus on Teardrop Quads?

    Developing your teardrop quads not only enhances the appearance of your legs, but also contributes to better knee stability and function. This muscle is essential for activities such as running, jumping, and climbing, making it important for athletes and fitness enthusiasts alike. Additionally, strong VMO muscles can help reduce the risk of knee injuries and improve balance and coordination.

    Effective Exercises for Teardrop Quads

    Here are some exercises specifically designed to target the teardrop quads:

    1. Squats

    Squats are a fundamental exercise that effectively engages the quads, including the VMO.

    How to Do It:

    • Stand with your feet shoulder-width apart.
    • Keep your chest up and back straight as you lower into a squat, pushing your hips back and bending your knees.
    • Go as low as you can while maintaining proper form, ideally until your thighs are parallel with the floor.
    • Push through your heels to return to standing. Aim for 3 sets of 10-15 repetitions.

    2. Wall Sits

    Wall sits are an isometric exercise that places significant emphasis on the quads.

    How to Do It:

    • Stand with your back against a wall and slide down to a seated position, with your knees bent at a 90-degree angle.
    • Keep your back flat against the wall and hold this position for 30-60 seconds.
    • Rest and repeat for 2-3 sets.

    3. Leg Extensions

    Leg extensions specifically target the quads, making them ideal for isolating the VMO.

    How to Do It:

    • Sit on a leg extension machine, back against the pad.
    • Adjust the pad so it rests on your lower shin just above your feet.
    • Extend your legs to lift the weight, focusing on squeezing the quads.
    • Lower back down in a controlled manner. Aim for 3 sets of 10-15 repetitions.

    4. Single-Leg Squats

    Single-leg squats are excellent for improving balance while specifically targeting the teardrop quads.

    How to Do It:

    • Stand on one leg, the other extended in front of you.
    • Squat down while keeping your knees and toes aligned.
    • Push through your heel to return to standing. Perform 5-10 repetitions on each leg for 2-3 sets.

    5. Lunges

    Lunges work multiple muscles in the legs, including the VMO, and help with overall leg strength.

    How to Do It:

    • Stand with your feet hip-width apart.
    • Step forward with one leg and then lower your hips until both knees are bent to about 90 degrees.
    • Push back to the starting position and switch legs. Perform 10-15 repetitions on each leg for 2-3 sets.

    6. Step-Ups

    Step-ups are functional exercises that engage the quads and promote strength and stability.

    How to Do It:

    • Stand in front of a solid bench or step.
    • Step up with one foot and press through the heel to lift your body onto the step.
    • Step back down, and repeat with the other leg. Aim for 10-15 repetitions per leg for 2-3 sets.

    7. Cycling

    While not a traditional strength exercise, cycling is great for building quad strength and endurance.

    How to Do It:

    • Use a stationary bike or cycle outdoors.
    • Maintain a moderate resistance and focus on pedaling efficiently for 20-30 minutes.

    Tips for Success

    • Warm Up: Always begin with a warm-up to prepare your muscles and prevent injury.
    • Focus on Form: Prioritize proper form to maximize effectiveness and minimize the risk of injury.
    • Gradual Progression: Start with lighter weights or easier variations and gradually increase intensity as you gain strength.
    • Consistency is Key: Aim to include these exercises in your routine 2-3 times a week for optimal results.

    Conclusion

    Incorporating exercises that target the teardrop quads into your fitness regimen can lead to stronger, more defined legs. Not only will you enhance your athletic performance, but you’ll also contribute to better knee stability and injury prevention. With dedication and consistency, you can sculpt your legs and achieve the teardrop quad look you desire.